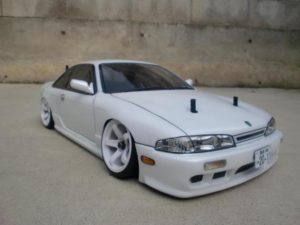
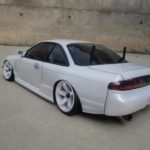
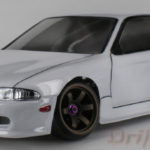
 July 29 2011 Update: New pictures Drift Stage D-Like has done it again! They have just announced their brand new Nissan Silvia S14 Body. This body will be made in 3 parts; front bumper, rear bumper and body, for the the ultimate detailed looking Nissan Silvia S14. D-like is currently taking pre-orders for this body. Like the 180SX body, this will also be a high demand RC drift body, so get them while you can.


This body will be 190mm and include body the window masks. Made of Polycarbonate material in 3 separate sections; front bumper, rear bumper and the actual body. This will again be a limited production body, so get them while they last!


Source: Drift Stage D-Like
- Builds & Reviews
- Categories
- Tools
- Guides
- 1/10 Scale RC Body Listing
- Belts Guide
- Chassis Guide
- Electronics Guide
- Frequently Asked Questions – RC Drifting
- Getting Started Guide
- Lithium Polymer Li-Po Terminology and Concepts
- Pulleys Guide
- Spring Rates Guide
- Suspension & Gearing Guide
- Technique & Practice Guide
- Tire & Camber Guide
- Yokomo CS Gears Guide
- Body of The Month Gallery
- Forum
- Contact Us
- Shop
Drift Stage D-Like Nissan Silvia S14 Body
You are here:
- Home
- Drift Bodies
- Drift Stage D-Like Nissan Silvia…


Very nice. Looking to get one of these.
I just bought this body, it has no guidelines to follow, i have never had an rc body that comes in pieces. is there any links to a build of one of these bodys? i just want to know the best way (proper way) to cut and glue the bumpers on etc. just dont want to ruin it! any help would be appreciated a lot.
josh
Yea these bodies come separated bumpers due to the molding process, to get certain details you can only use certain manufacturing processes. They are made in several pieces for greater details. Unfortunately there is no guide to assembling them. Most people use double sided tape to hold them together. Just be careful and cut following certain mold lines that define the body. Feel free to send us an email, we will try to help where possible 🙂
Oh ok, im with ya. They do look awesome with the added detail. i hope i can get it right! im still an amateur rc shell artist! …so when i cut the main body out should i leave a few millimetres extra outside the mould lines to double sided tape the bumpers onto, is that the idea? Another issue i want to ask about is the decals for this particular make. the black borders for the windows aren’t reversed so obviously the window decals (and the rest) have to go on the outside, but it seems like they might look a little ‘cheap’ having to be stuck over the pillars and other mould lines etc? also the headlights are convex curves so the decal has to kinda go around the shaping two ways which i’ve found to be challenging. The pictures above look really good. I’m just wondering if theres any secrets or helpful tips someone may be able to share to help me get my d-like s14 shell looking immaculate!…
thanks heaps!
Yeah thats the idea, just take your time and start with the main body. Once that is cut you will be able to see where you can fasten the addons to. But window decals always go on the outside… not sure if I understood what you were saying. Yeah curving decals are not the easiest. It takes a lot of time and effort to get them on without any bubbling or imperfections. Really it just takes time and patience also helps 🙂
The pictures above do not use headlight decals, rather they are light buckets…
The only real bit of advice I can give you is to take your time. Details are always time consuming but worth while doing! Just be patient and thinking about it before hacking and slashing 😉
where can i find this body ?
Check banzaihobby.com or other online vendors, this will likely have to come from Japan
what is the wheelbase on these?
where can i find this body ?
Check banzaihobby.com or other online vendors, this will likely have to come from Japan
what is the wheelbase on these?
I just bought this body, it has no guidelines to follow, i have never had an rc body that comes in pieces. is there any links to a build of one of these bodys? i just want to know the best way (proper way) to cut and glue the bumpers on etc. just dont want to ruin it! any help would be appreciated a lot.
josh
Yea these bodies come separated bumpers due to the molding process, to get certain details you can only use certain manufacturing processes. They are made in several pieces for greater details. Unfortunately there is no guide to assembling them. Most people use double sided tape to hold them together. Just be careful and cut following certain mold lines that define the body. Feel free to send us an email, we will try to help where possible 🙂
Oh ok, im with ya. They do look awesome with the added detail. i hope i can get it right! im still an amateur rc shell artist! …so when i cut the main body out should i leave a few millimetres extra outside the mould lines to double sided tape the bumpers onto, is that the idea? Another issue i want to ask about is the decals for this particular make. the black borders for the windows aren’t reversed so obviously the window decals (and the rest) have to go on the outside, but it seems like they might look a little ‘cheap’ having to be stuck over the pillars and other mould lines etc? also the headlights are convex curves so the decal has to kinda go around the shaping two ways which i’ve found to be challenging. The pictures above look really good. I’m just wondering if theres any secrets or helpful tips someone may be able to share to help me get my d-like s14 shell looking immaculate!…
thanks heaps!
Yeah thats the idea, just take your time and start with the main body. Once that is cut you will be able to see where you can fasten the addons to. But window decals always go on the outside… not sure if I understood what you were saying. Yeah curving decals are not the easiest. It takes a lot of time and effort to get them on without any bubbling or imperfections. Really it just takes time and patience also helps 🙂
The pictures above do not use headlight decals, rather they are light buckets…
The only real bit of advice I can give you is to take your time. Details are always time consuming but worth while doing! Just be patient and thinking about it before hacking and slashing 😉
Very nice. Looking to get one of these.