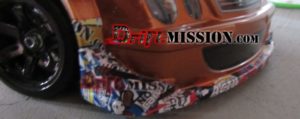
 DriftMission.com is proud to present our Do It Yourself DIY decals! These are as close to vinyl that you can make at home. We have tried numerous different labels, waterslide decals, and sticker paper until we settled on these selections. You will need a few items to make your own decals, we have outlined them below.
Follow the steps after the jump to make your own rc decals for your drift machine. Let us know if you have any tips or have found other labels that work well.
Requirements
- Computer with a Color Laser Printer *Preferred Method* (Color Laser Jet works but isn’t capable of vibrant color reproduction.)
- Sciscors
- GBC SelfSeal 9×12 #3747307 Laminating Sheets
- 8.5 or 11 inch straight edge
- Graphics to be printed (Link to DriftMission.com Stickerbomb)
Avery Decal Sheet Options (Depending on application)
- Avery TrueBlock White Mailing Labels for Laser #05165
- Avery Clear Full Sheet Labels for Laser/Inkjet #15665
- Avery Sticker Project Paper for Inkjet #03383


If you are printing a detailed image like the DriftMission.com stickerbomb it is best to use the TrueBlock Avery labels as they are the best for adheshion and richness. As you can see in the picture below the differences between all three options are quite apparent. The one problem with TrueBlock labels is that they have a white background and do not provide a see through look for that vinyl finish. This is where the Clear Full Sheet labels come in handy, however due to the fact these are clear the color reproduction suffers tremendously. This can be solved by working on darkening the image and printing until you find the desired color. The clear sheets do not adhere as well to lexan as the TrueBlock/Sticker labels, so expect them to last 2-6 months before they being to peel/fall off.
You can see the final result with all three examples below.


Step One
Open the graphic you wish to print, insert the desired label paper into your printer.
Step Two
Print the graphic to your printer, ensure the printer settings are set to max quality levels. Additionally for the paper type we found it best to select “Matte Photo Paper”.

Step Three
Take the printed label and place it on a hard surface.
Step Four
Take one sheet of the GBC SelfSeal Laminate and peel back roughly 1/5 of the backing.
Step Five
Carefully place the unpeeled laminate and begin placing it on the printed label. It is best to hold the label as you place the laminate over top.
Step Six
Take your straight edge of choice and press it over the laminate while slowly pulling the remaining backing off.
Step Seven
Use the straight edge to get any remaining air bubbles or imperfections out.
Step Eight
Trim off the edges, and trim the final product to your desired size.
Step Nine
Profit?!?


Thanks for taking the time to read our how to make custom rc drift decals, let us know if you have found any other ways to create these at home! Leave any questions or suggestions in the comments section below.


